How to draw a realistic owl?
Learn step by step how to draw a realistic owl. Follow the 9 steps and print the tutorial.
Learn how to draw a beautiful owl on a branch! Using simple shapes, you will create a real night bird.
Intro
Hi young artist! Today we are going to draw a wise owl sitting quietly on a branch. We will start with simple circles and turn them into a real bird step by step. Grab your pencil and eraser, and let's get started together!
Summary
In this drawing lesson, you will learn to draw an owl using ovals and guide lines. We build the bird up from a simple sketch to a detailed owl with feathers and claws.
Steps
Draw a horizontal line for the branch and an upright oval above it for the owl's head.
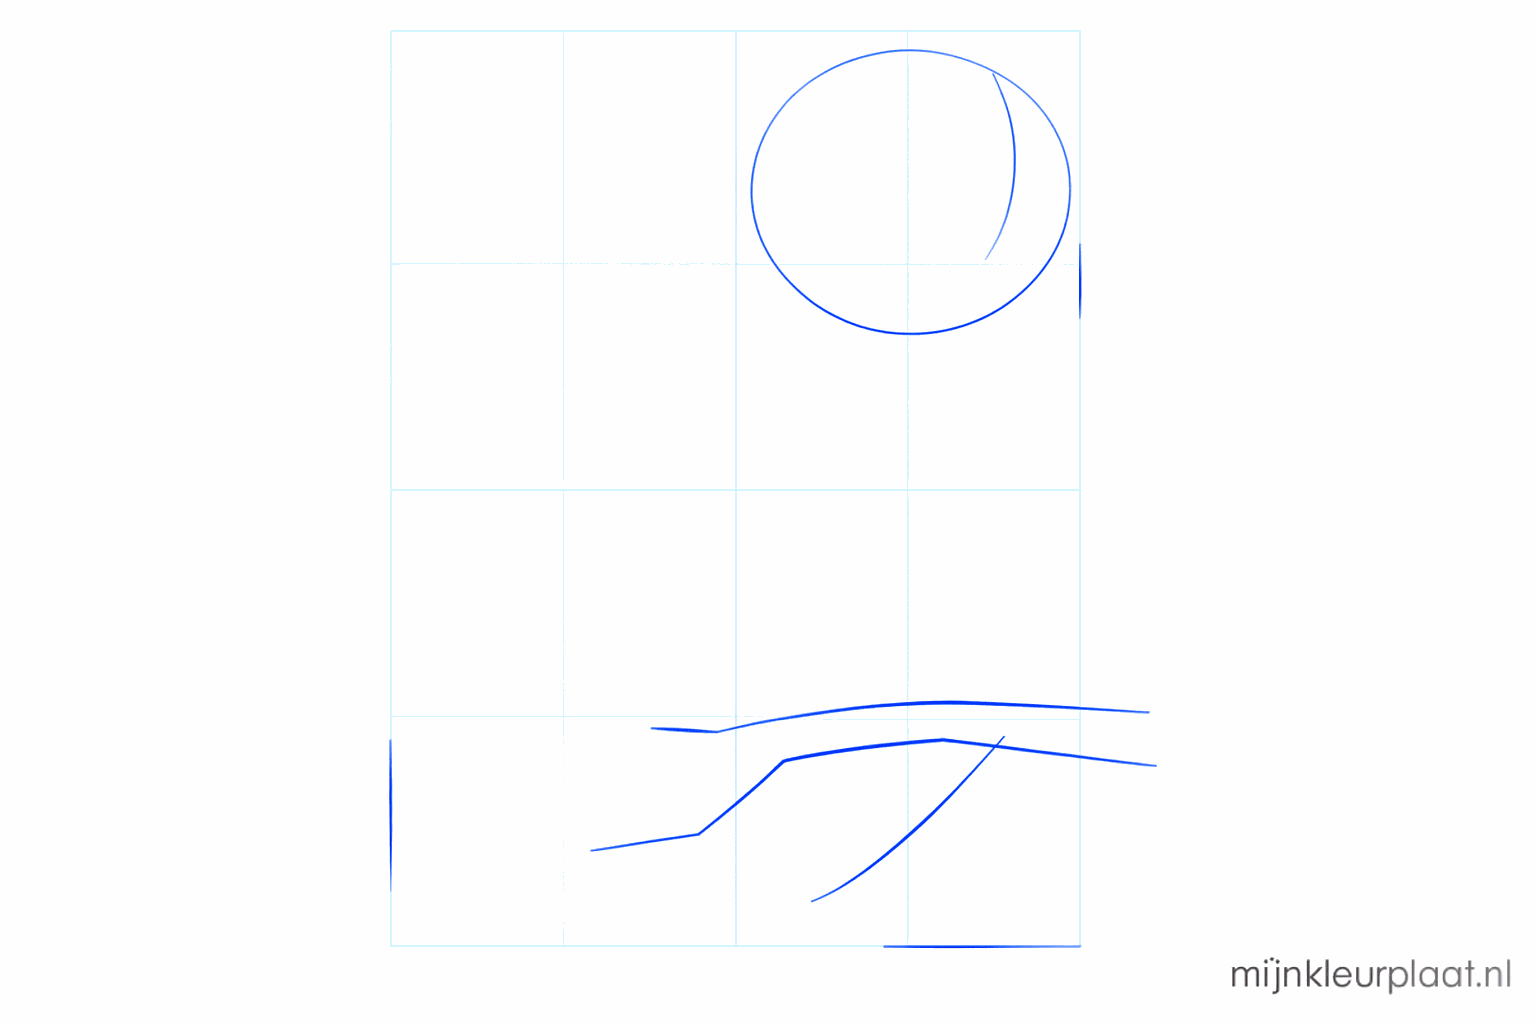
Draw a larger oval below the head for the body and place a cross in the head for the eyes.
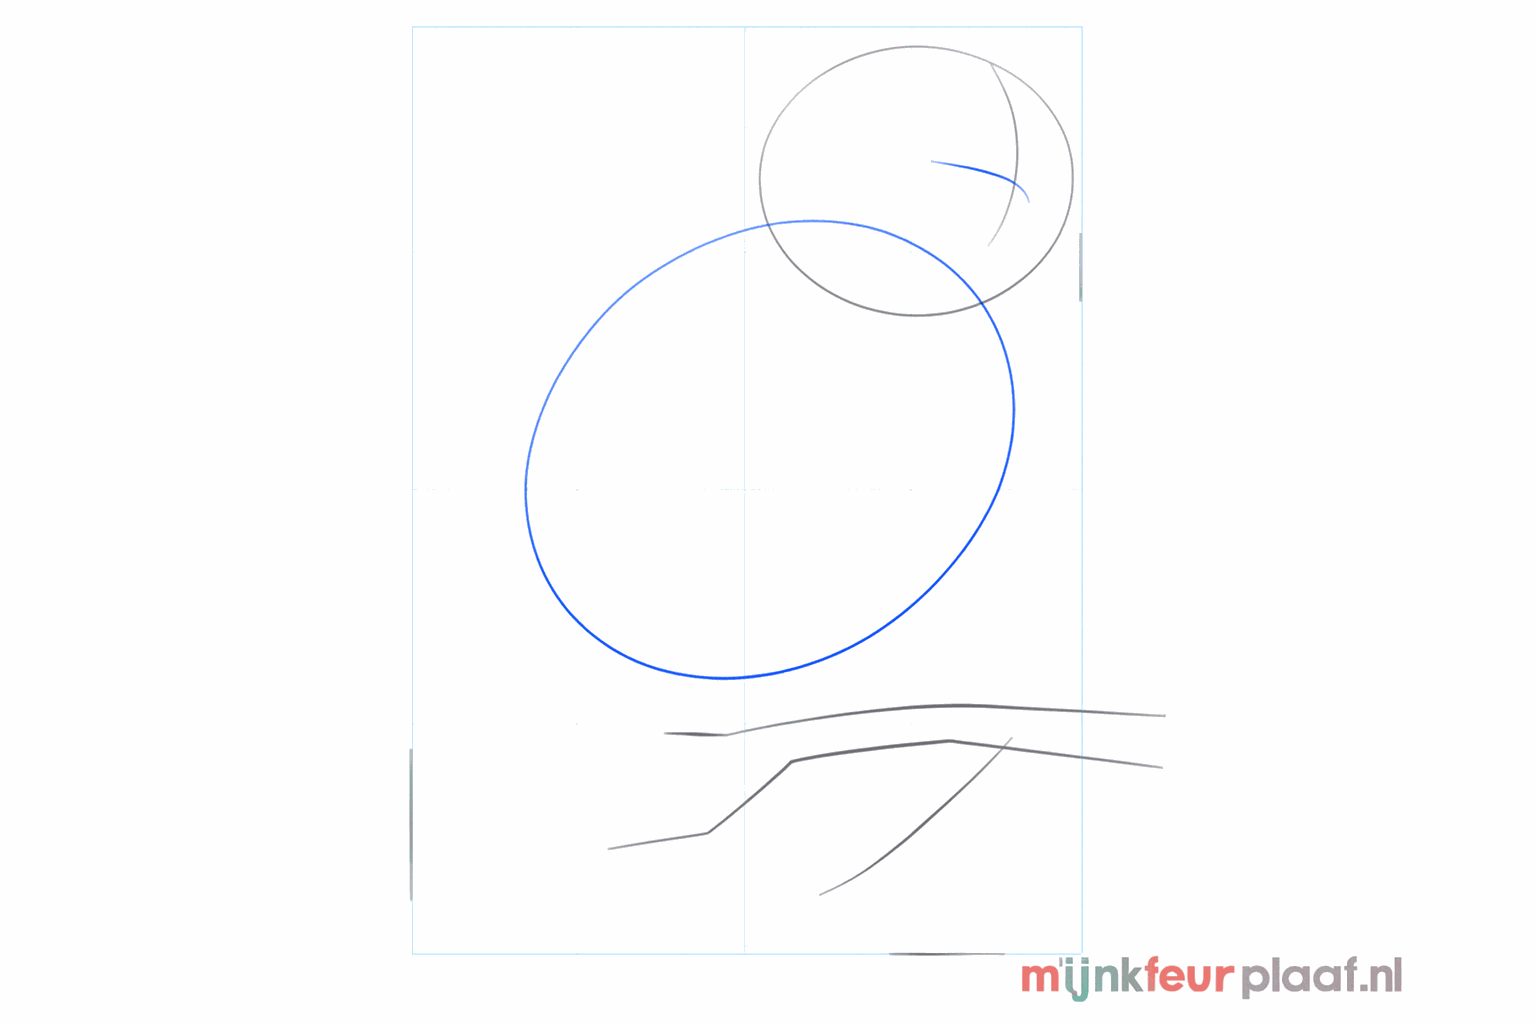
Flatten the top of the head slightly and draw two small points for the ear tufts.
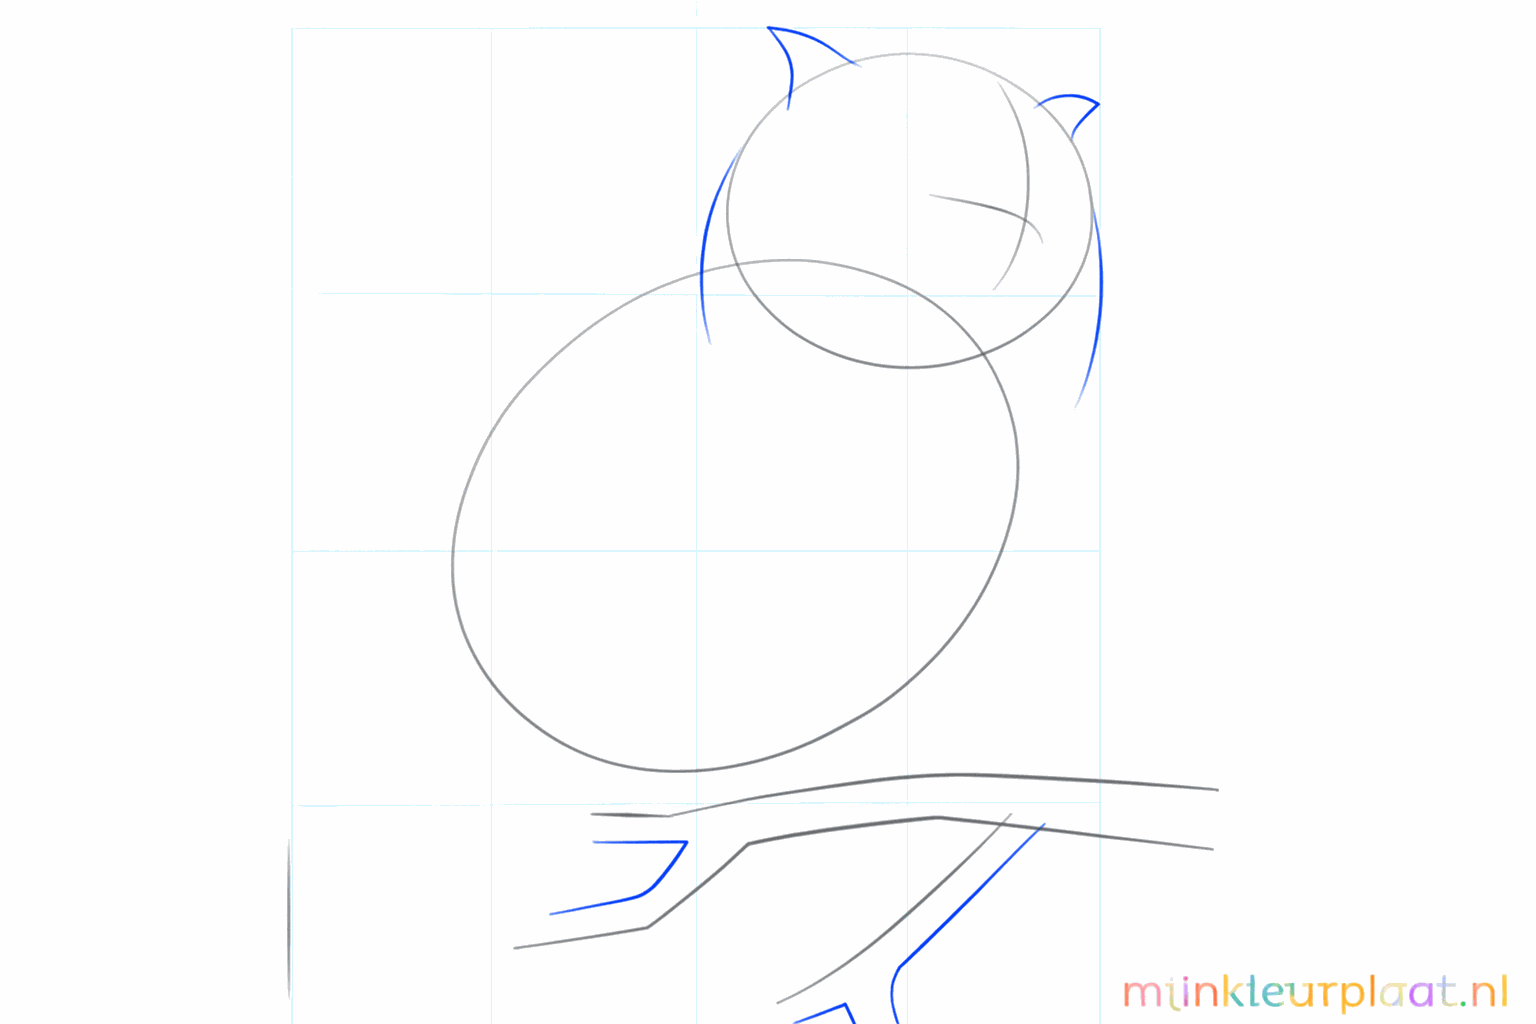
Draw a long arc on the side for the wing and connect the head to the body.
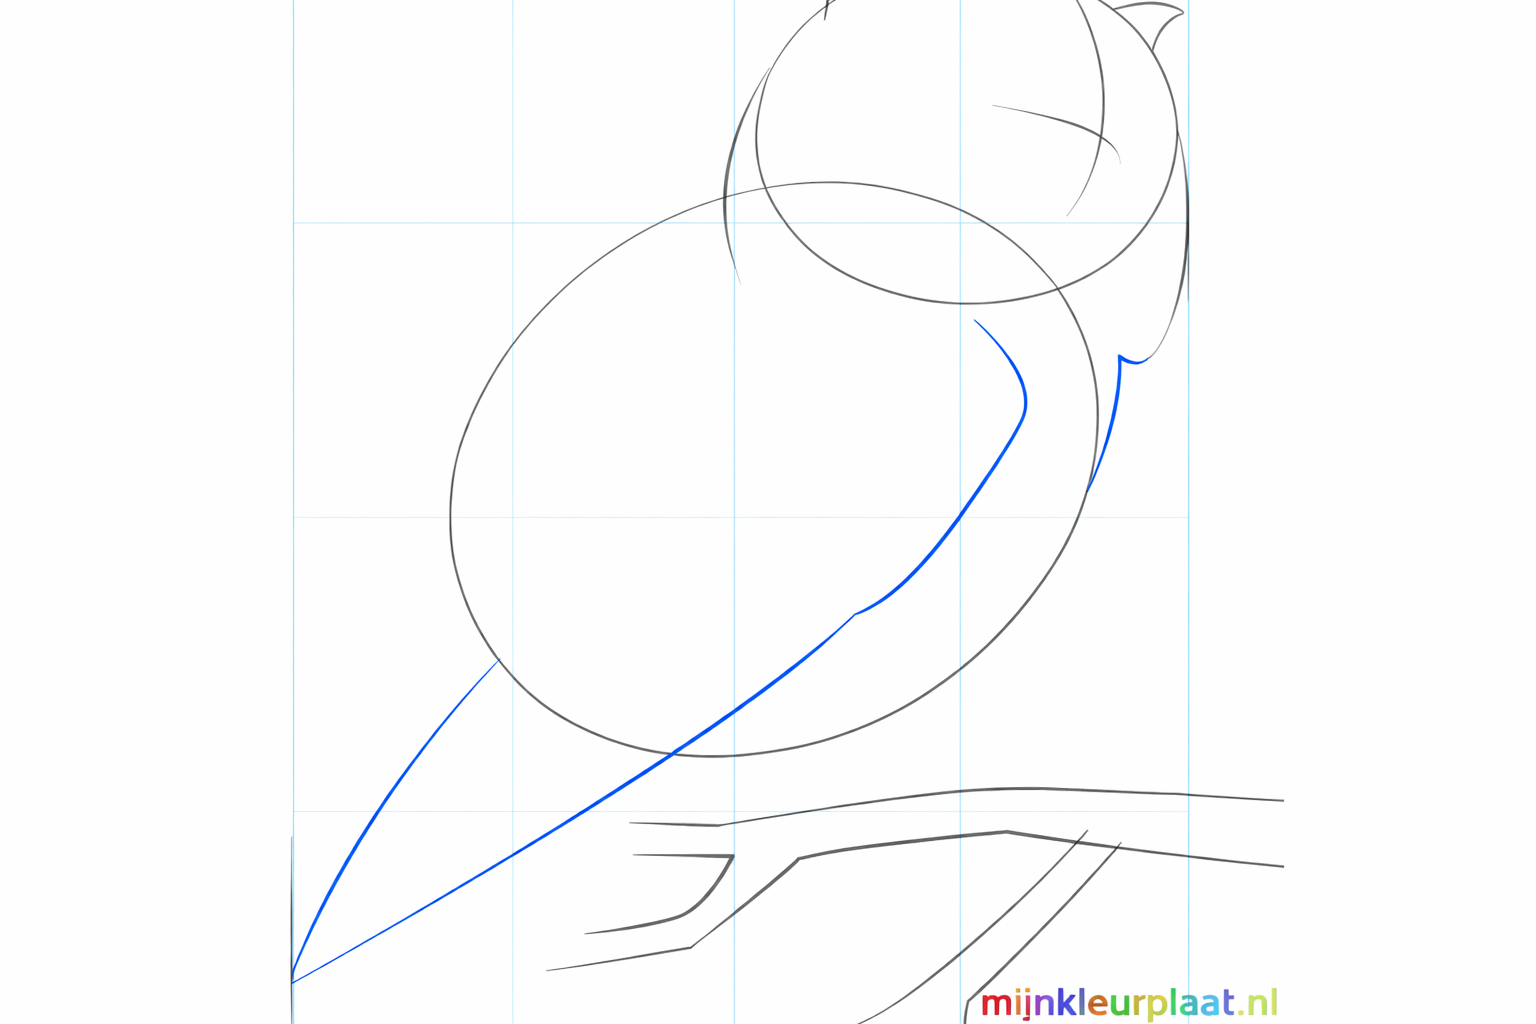
Sketch the round shapes in the face and draw two lines for the thick legs.
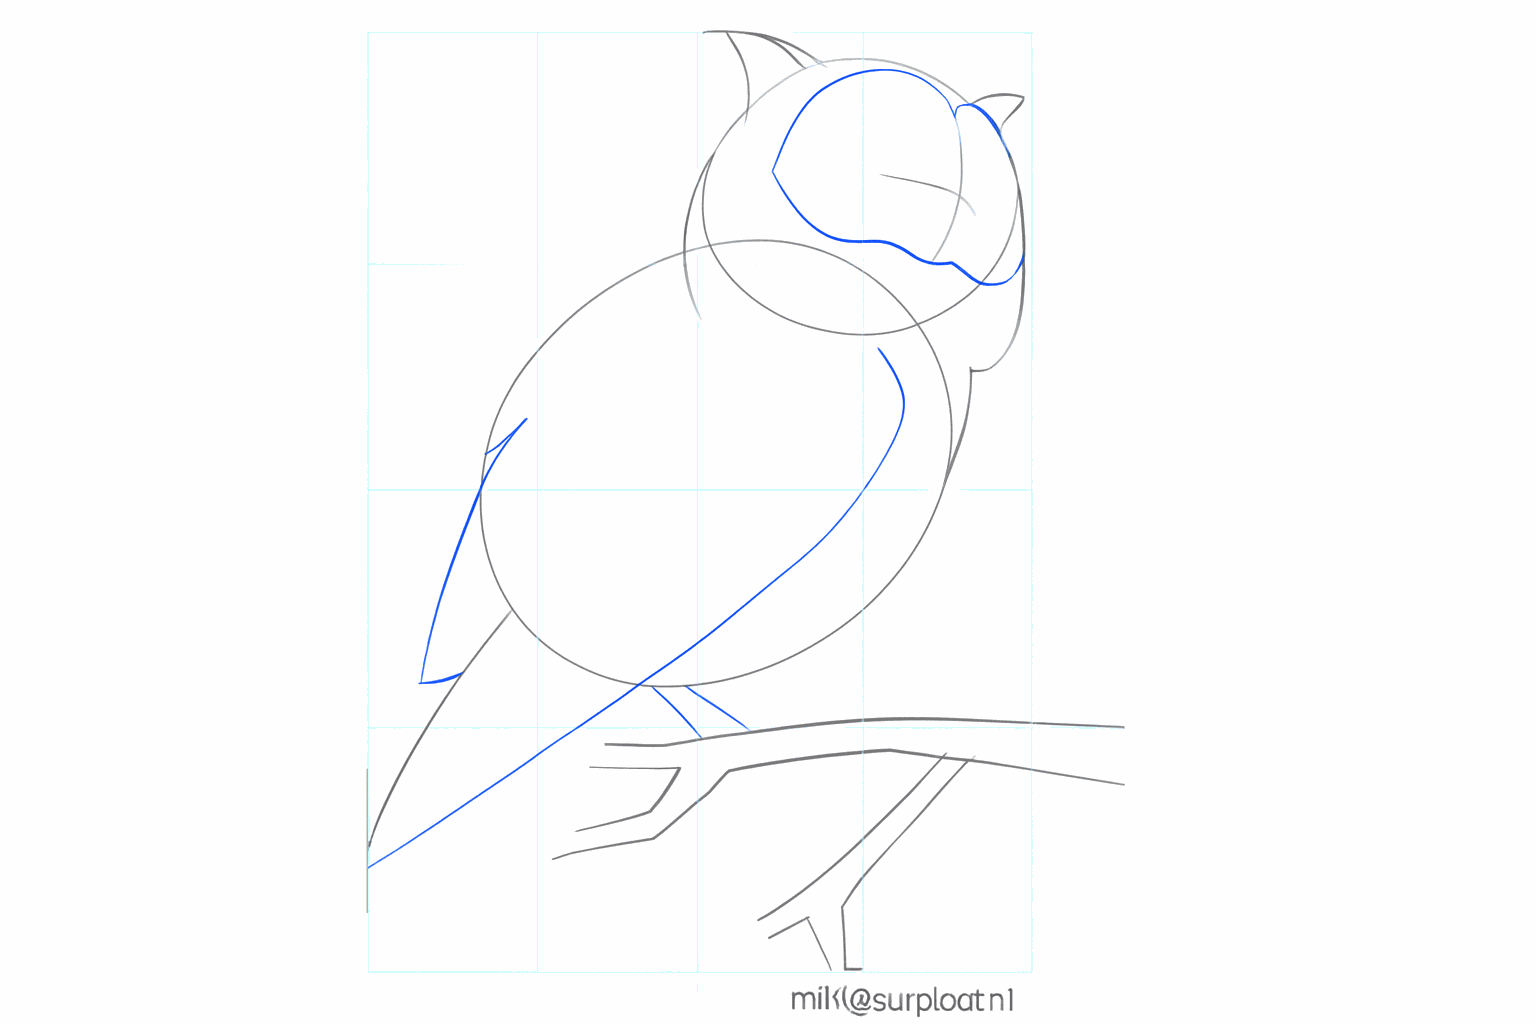
Draw the round eyes on the guide line, a beak in the middle, and the tail feathers at the bottom.
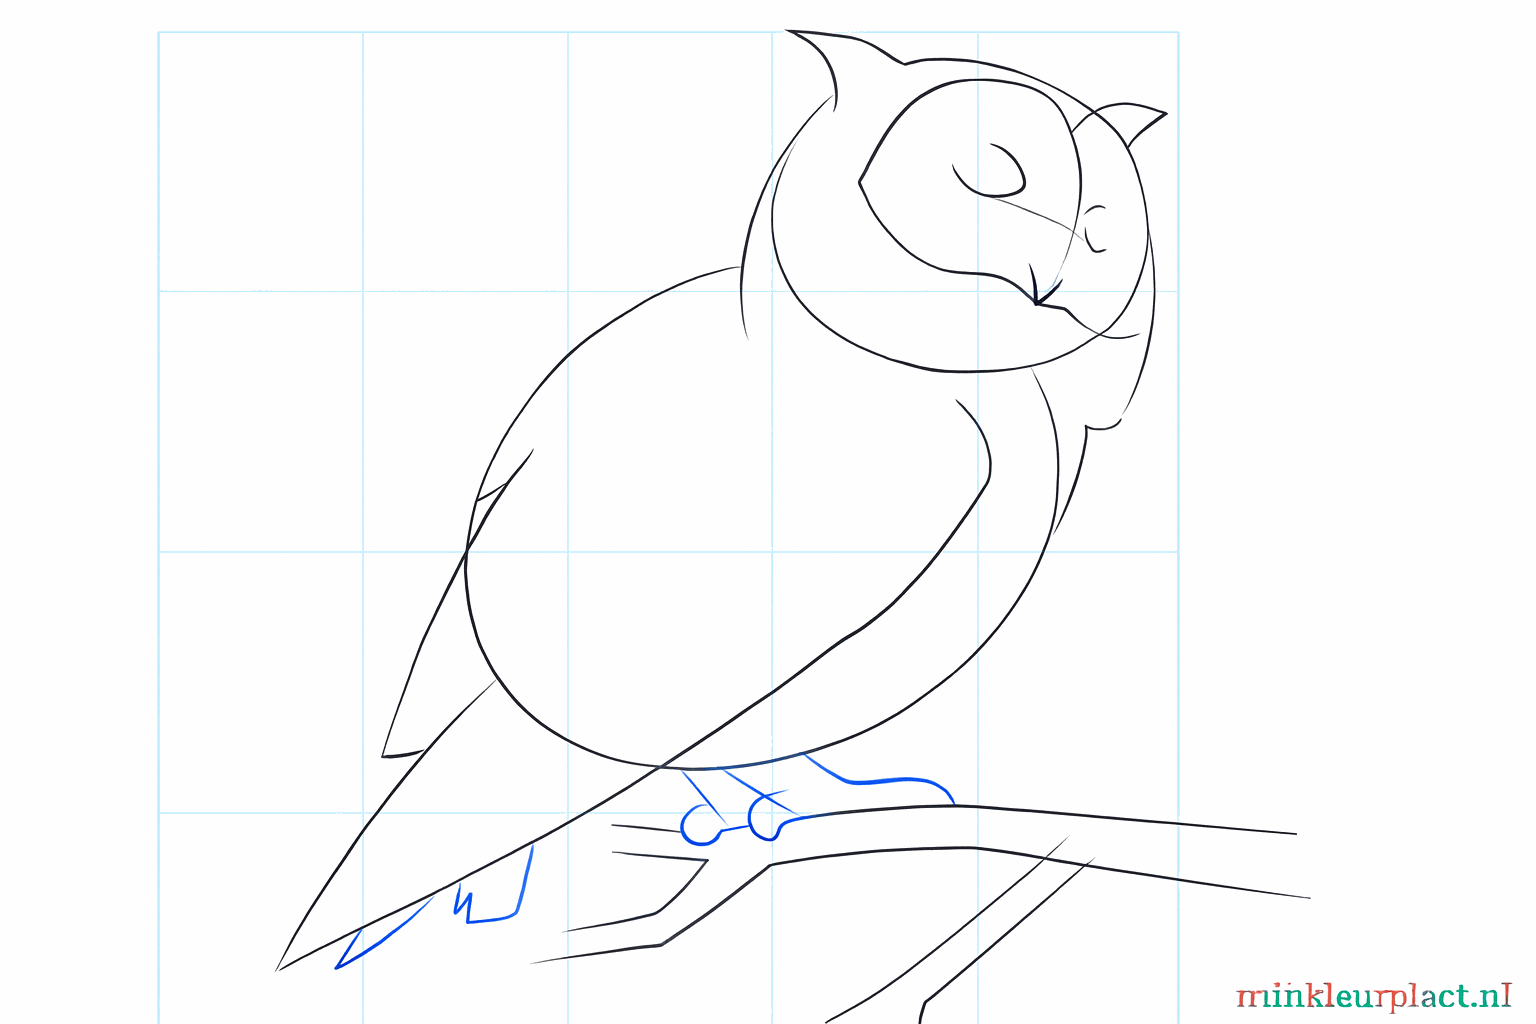
Draw the sharp claws gripping around the branch and give the wing more shape.
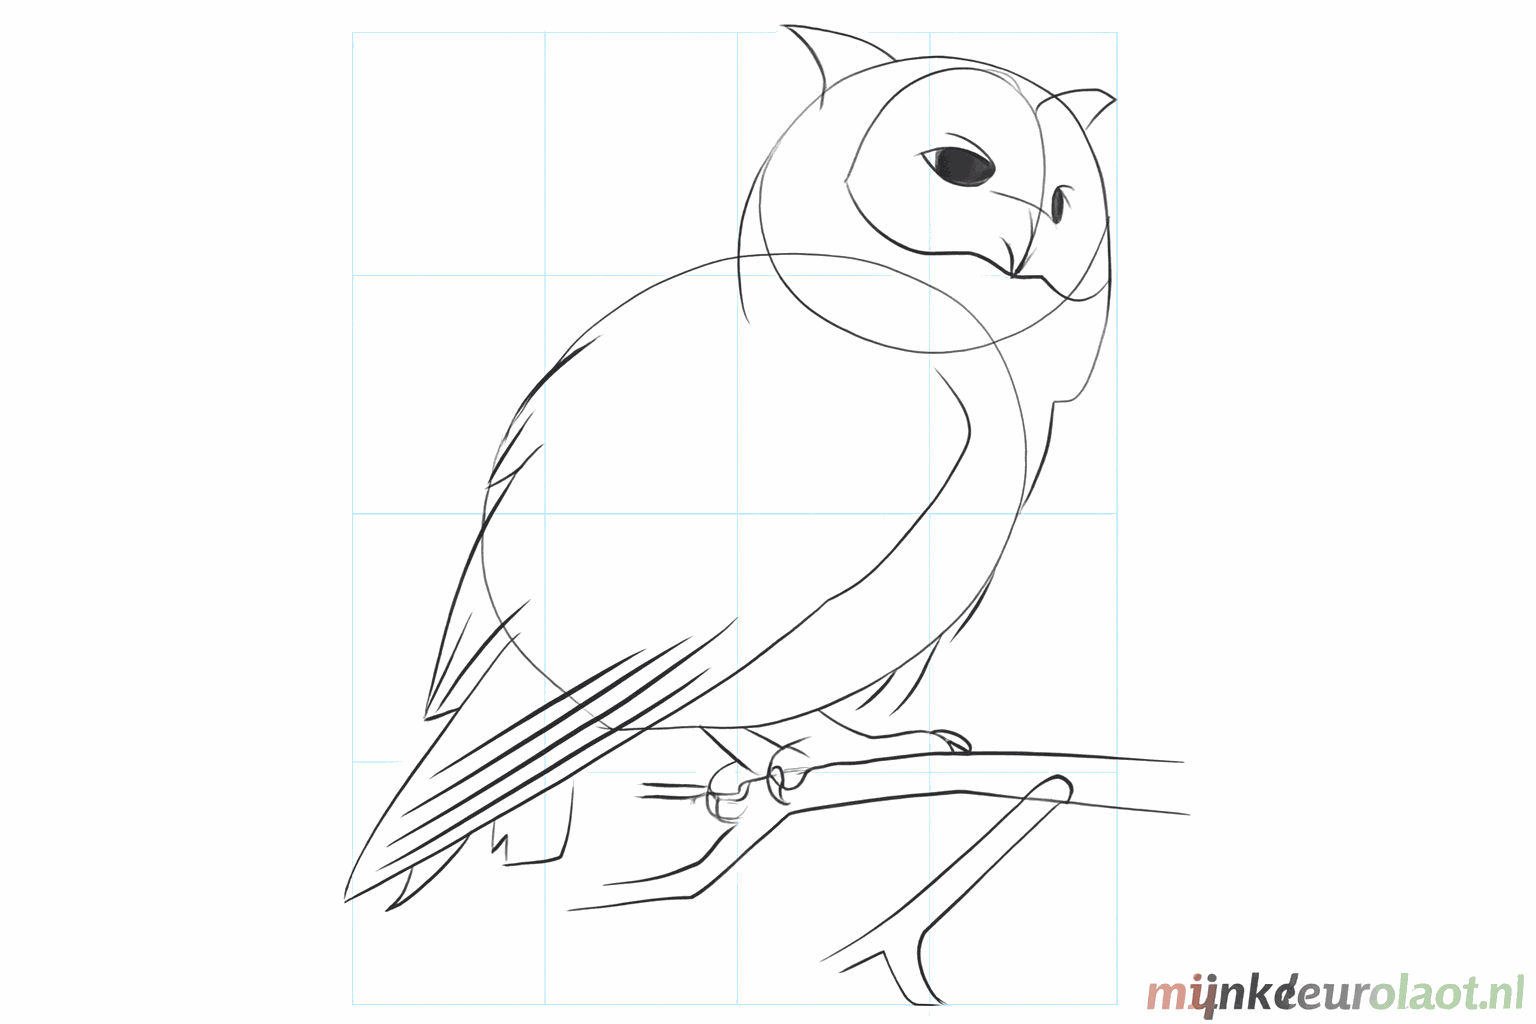
Add small strokes for the feathers on the chest and finish the details on the branch.
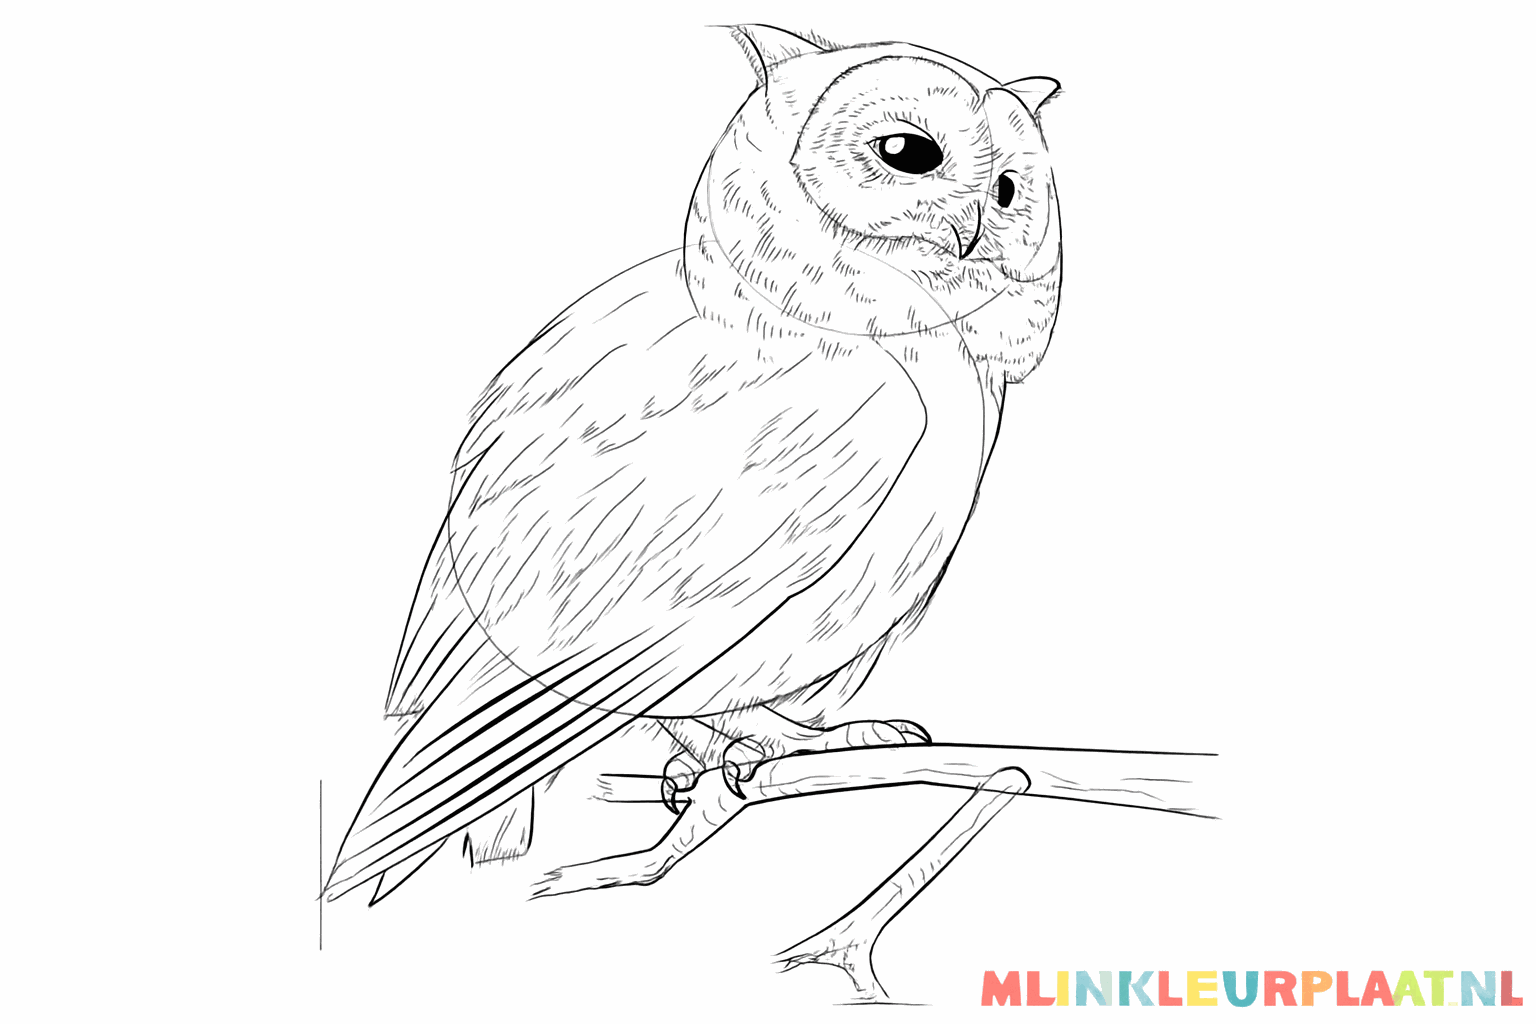
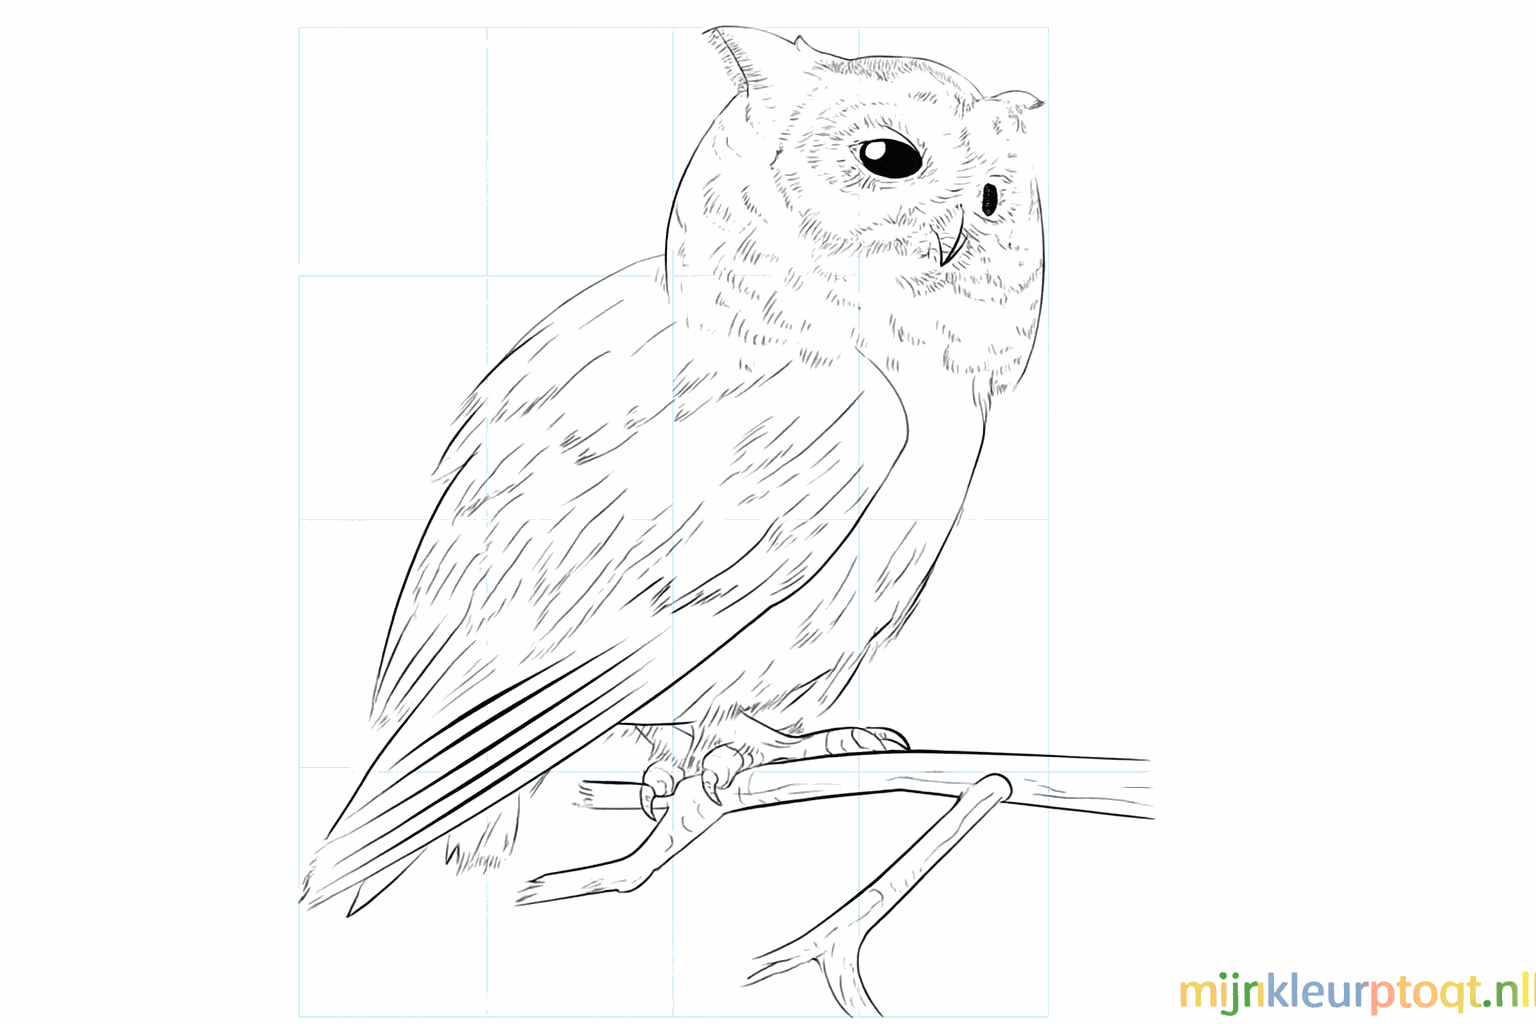
Darken the most important lines and carefully erase all the guide lines you no longer need.
Frequently asked questions
Which pencil is best to use?
How do I make the owl's feathers?
Does the owl have to stand exactly on the branch?
What if my circle isn't perfectly round?
Coloring pages of realistic owl
View all realistic owl coloring pagesRelated drawing lessons