How to draw a canada goose 2?
Learn step by step how to draw a canada goose 2. Follow the 9 steps and print the tutorial.
Learn how to draw a beautiful Canada goose step-by-step using simple shapes. Grab your pencil and join this fun drawing lesson!
Intro
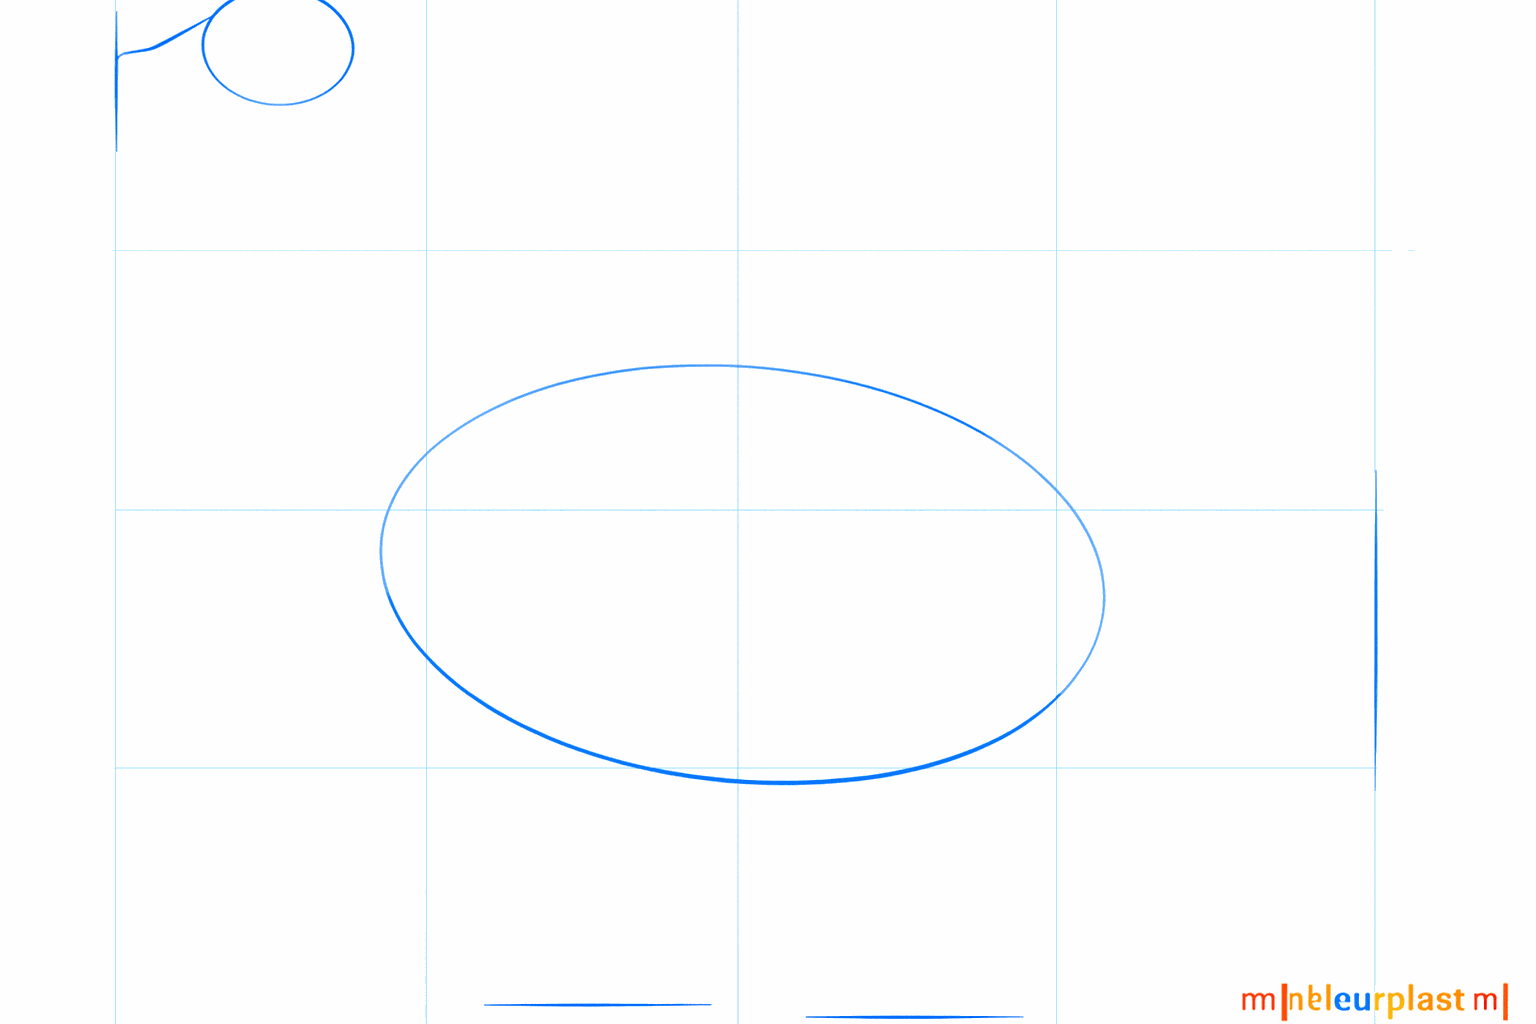
Hi little artist! Today we are going to draw a Canada goose, which you probably recognize by its long black neck. We start very easily with circles and ovals. Grab your drawing paper and an eraser, and let's get started together!
Summary
In 9 simple steps, you will learn how to draw a goose using basic shapes like ovals and lines. You start with the body and end with the details of the feathers.
Steps
Draw a large horizontal oval for the body and a small circle above it for the head.
Connect the head and the body with two curved lines to create the long neck.
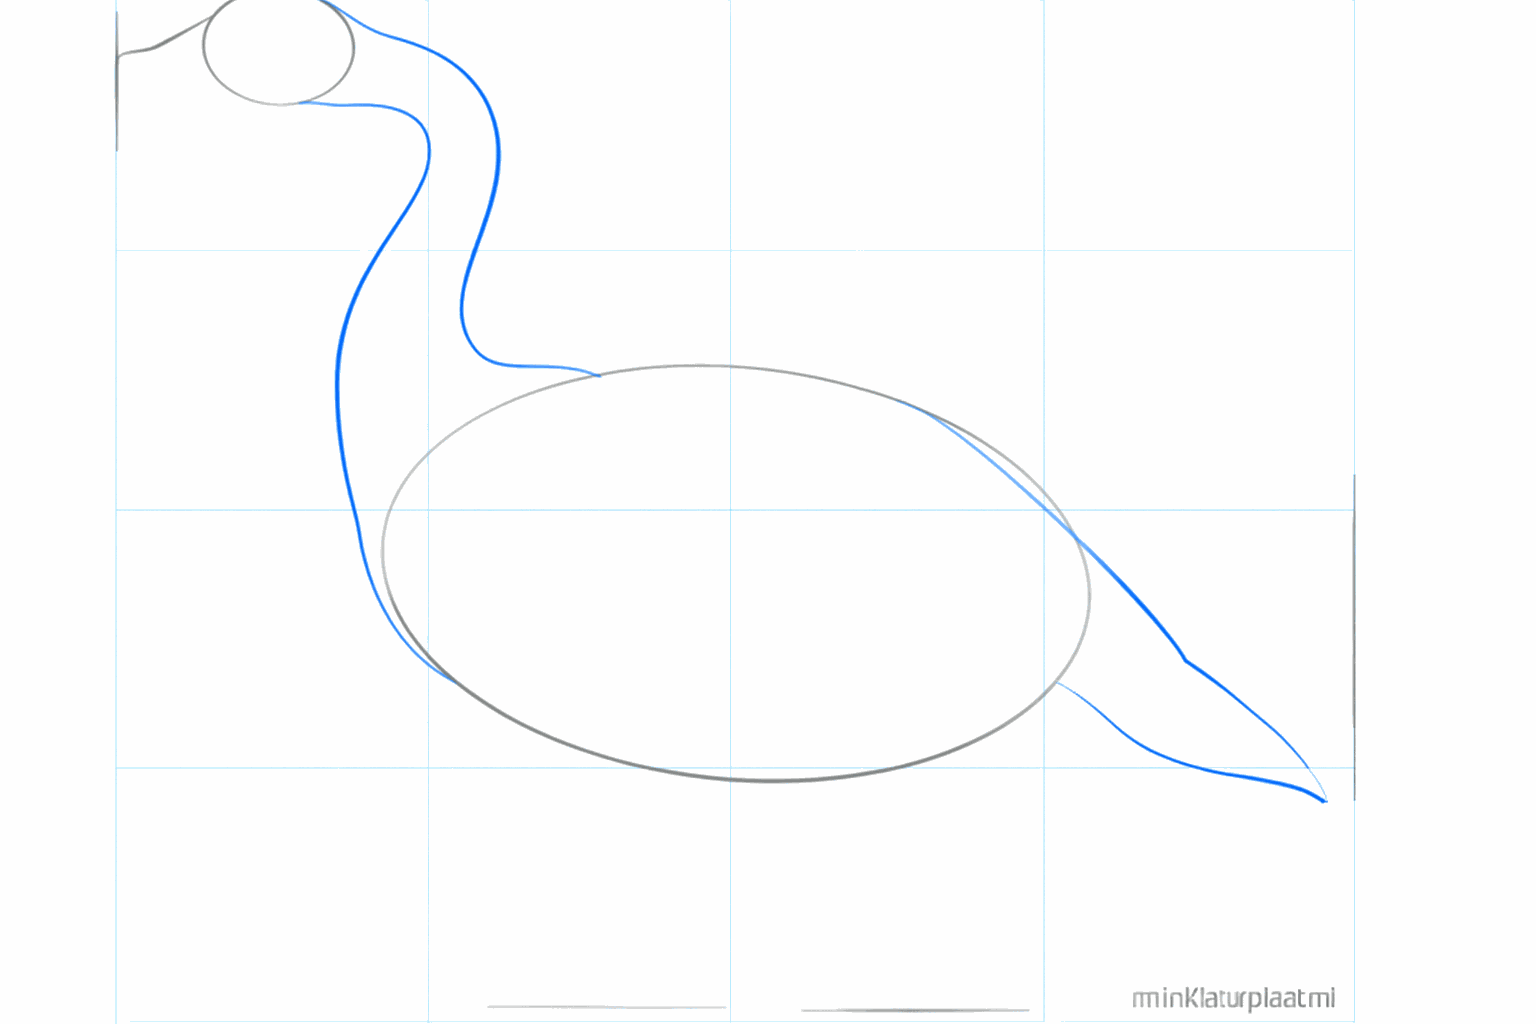
Draw a sharp point at the back of the body for the tail and a small line for the beak.
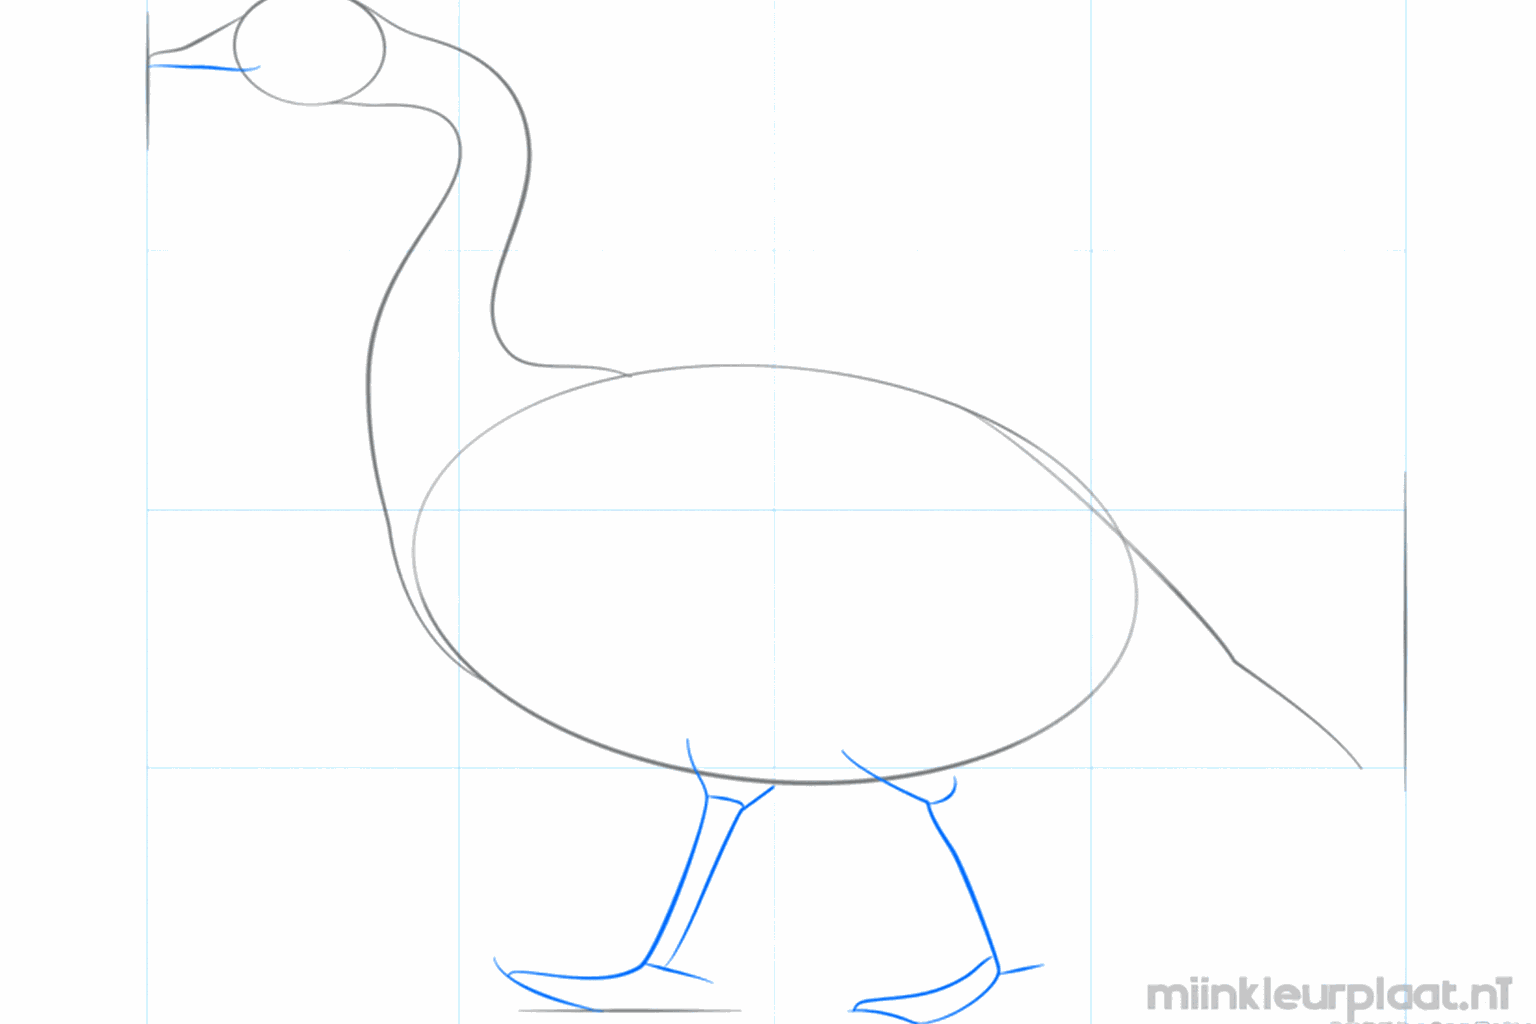
Place two straight lines under the body where the goose's legs will be.
Make the beak thicker and draw the top of the legs with small arcs.
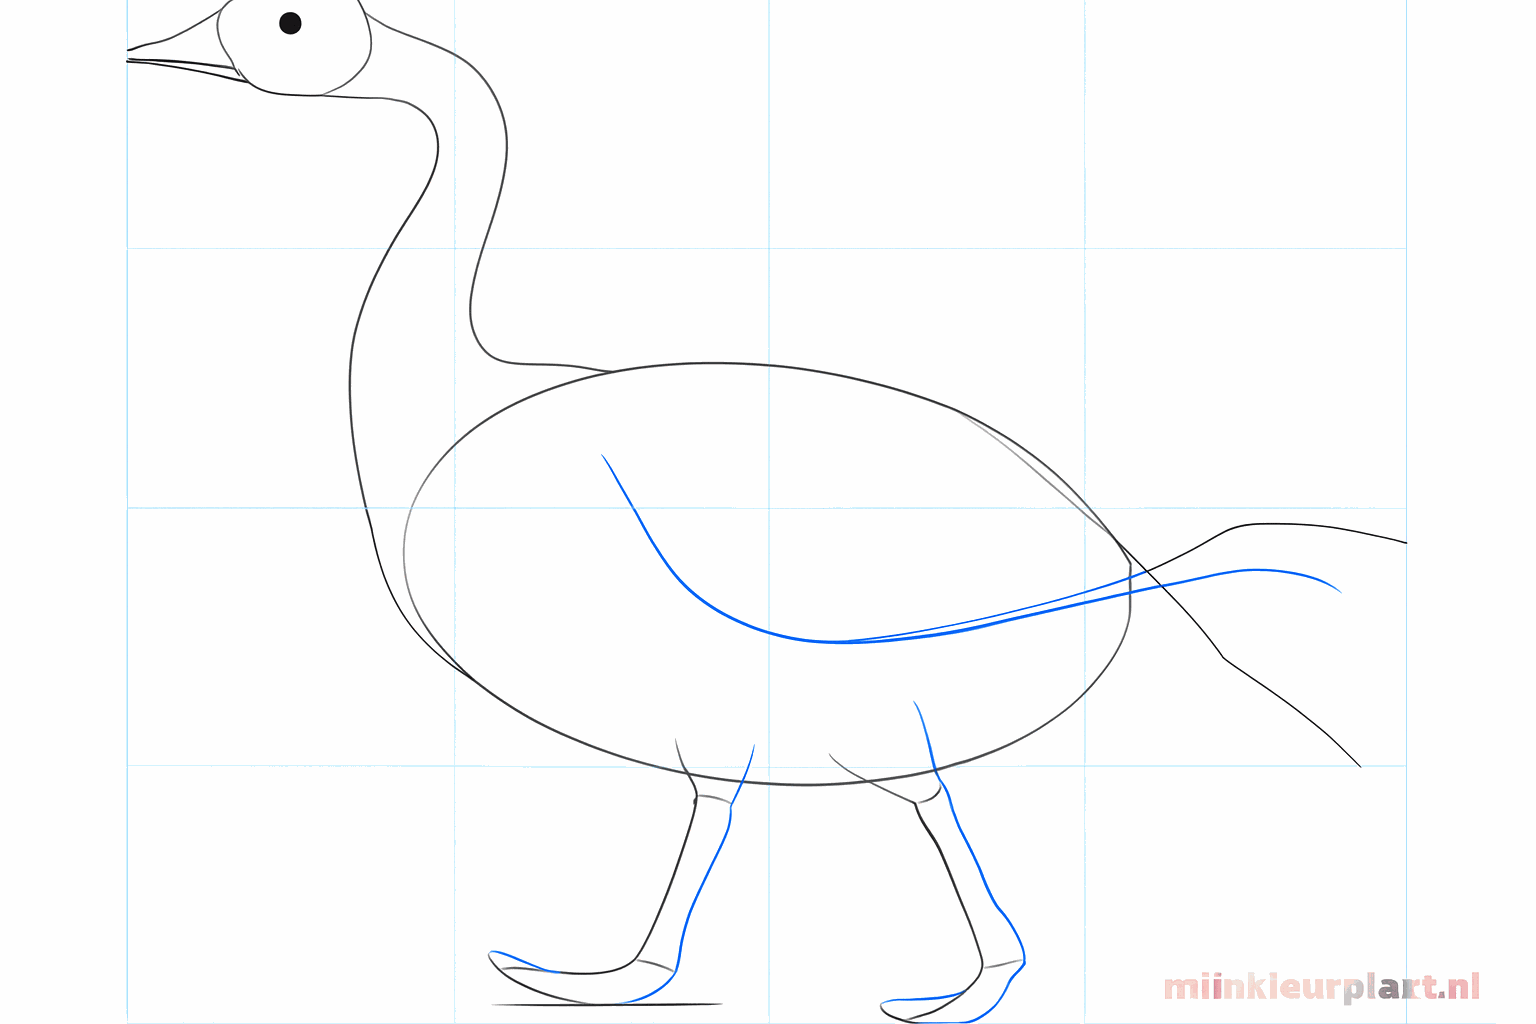
Draw a small round eye in the head and give the bird large webbed feet on the legs.
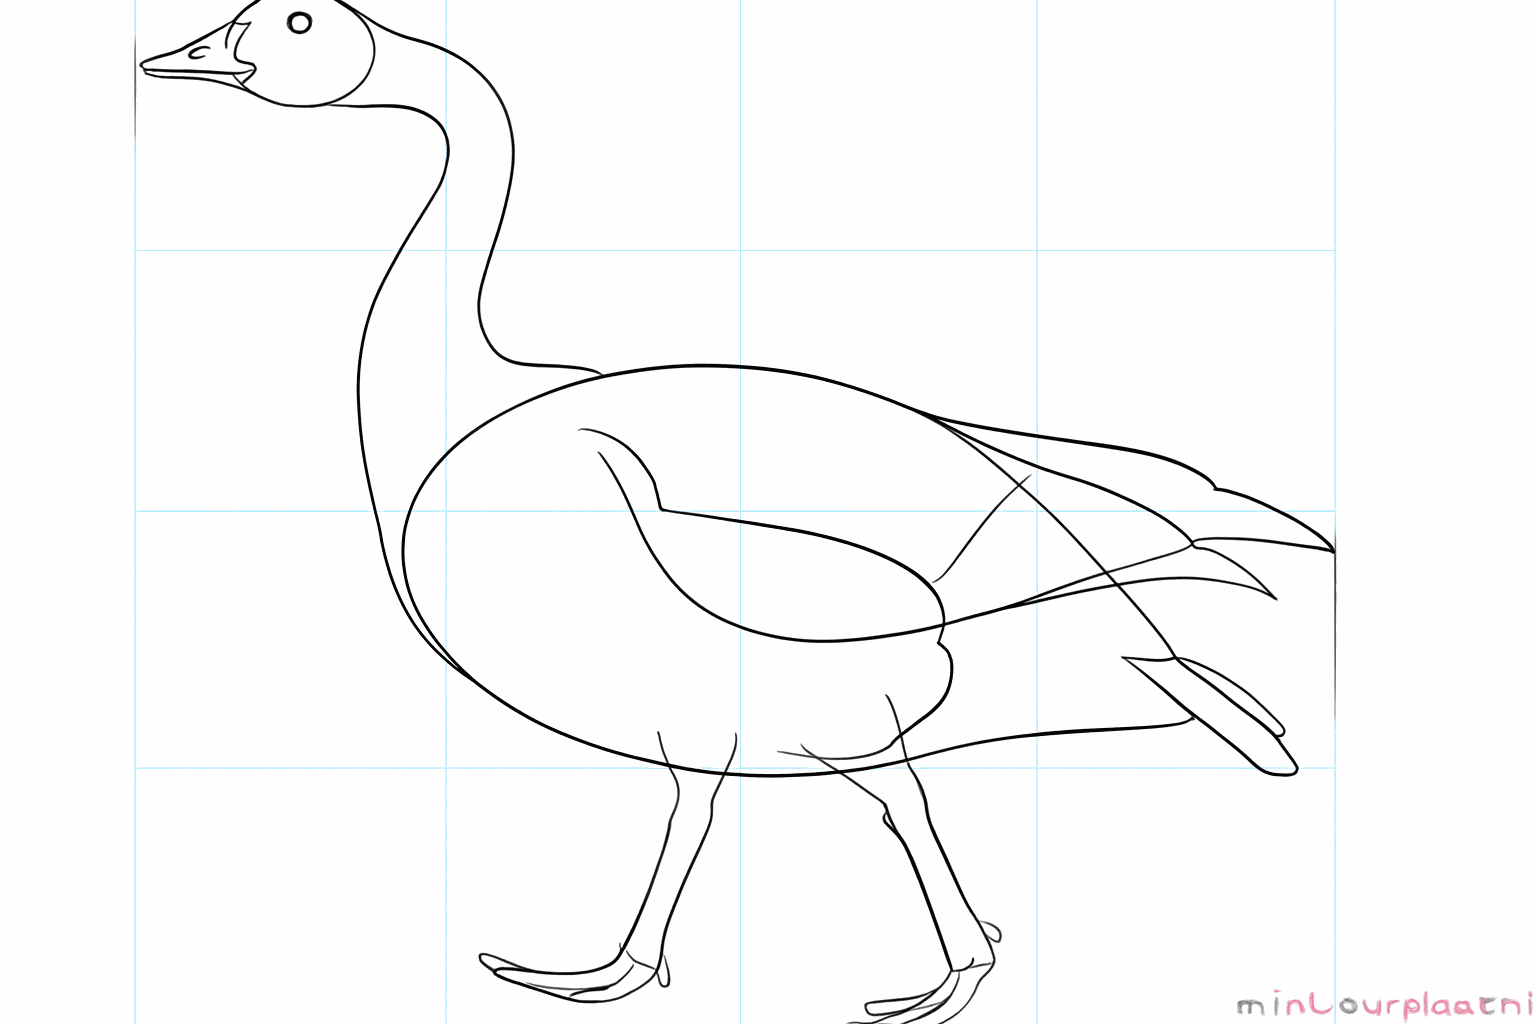
Draw a large curved line on the body to indicate the wing.
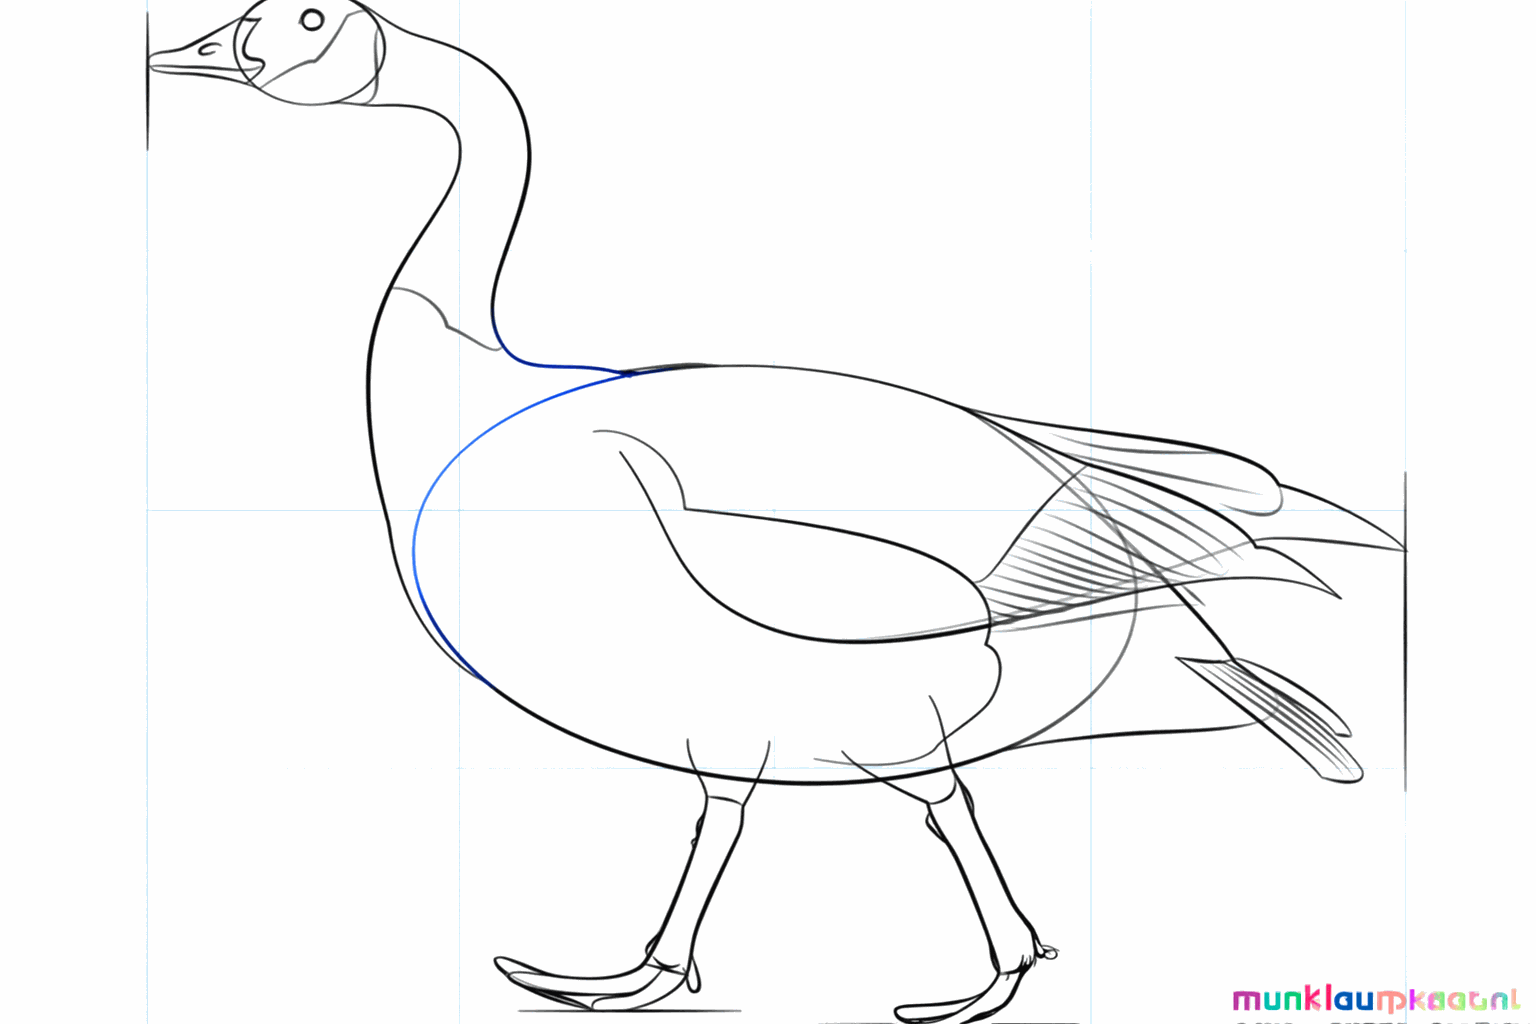
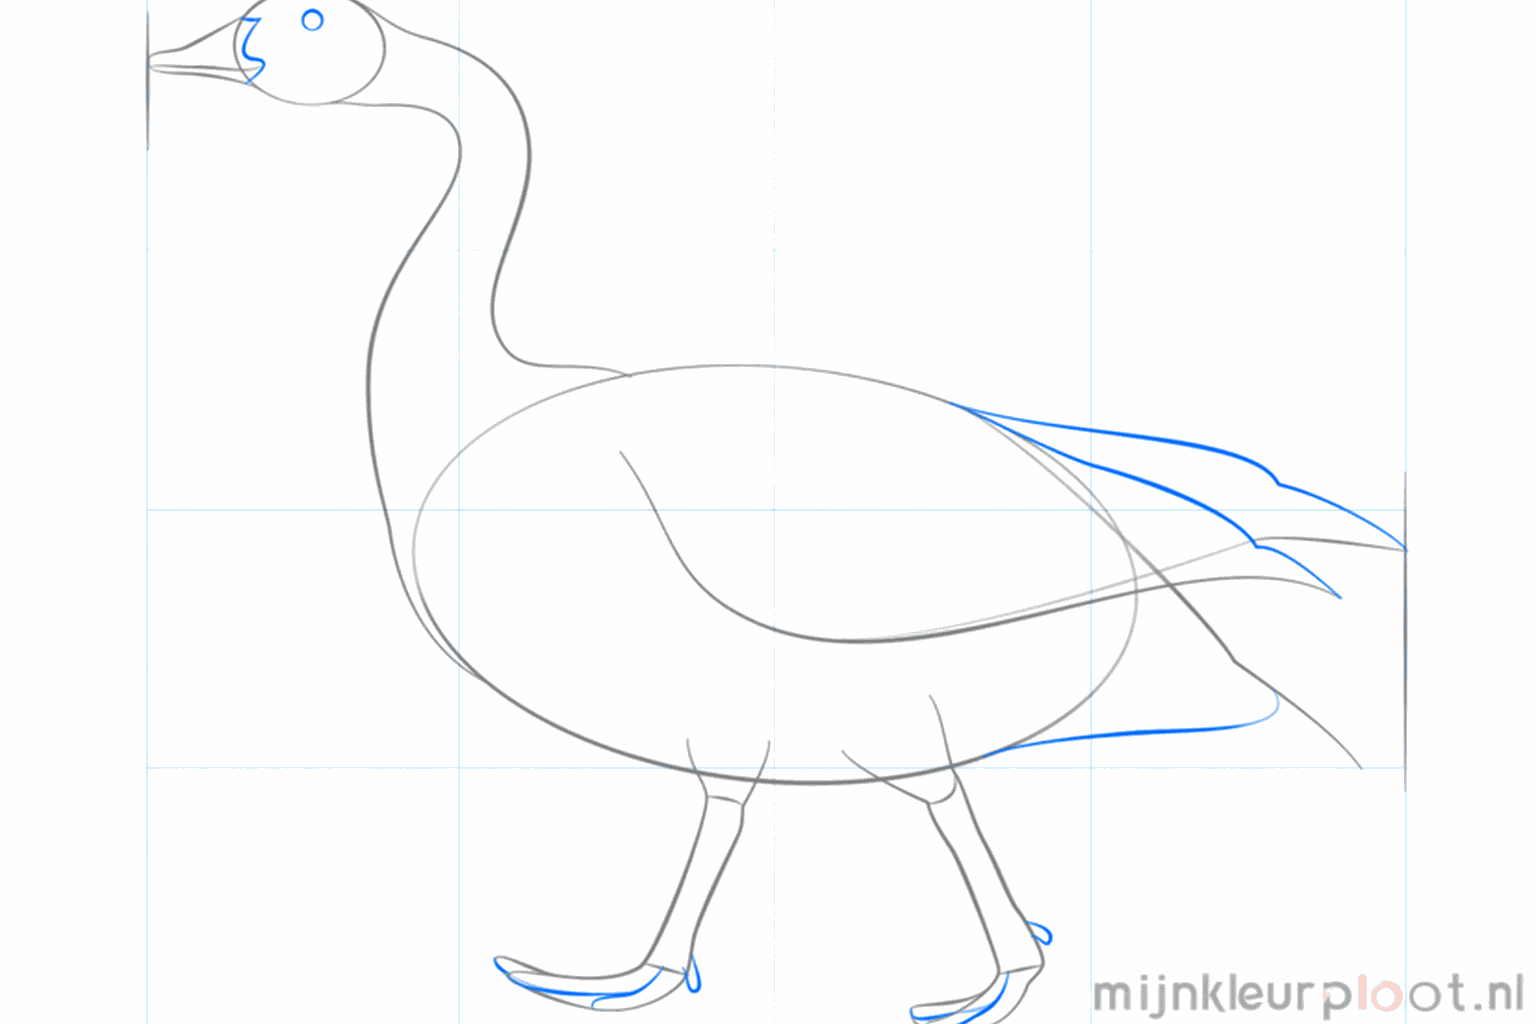
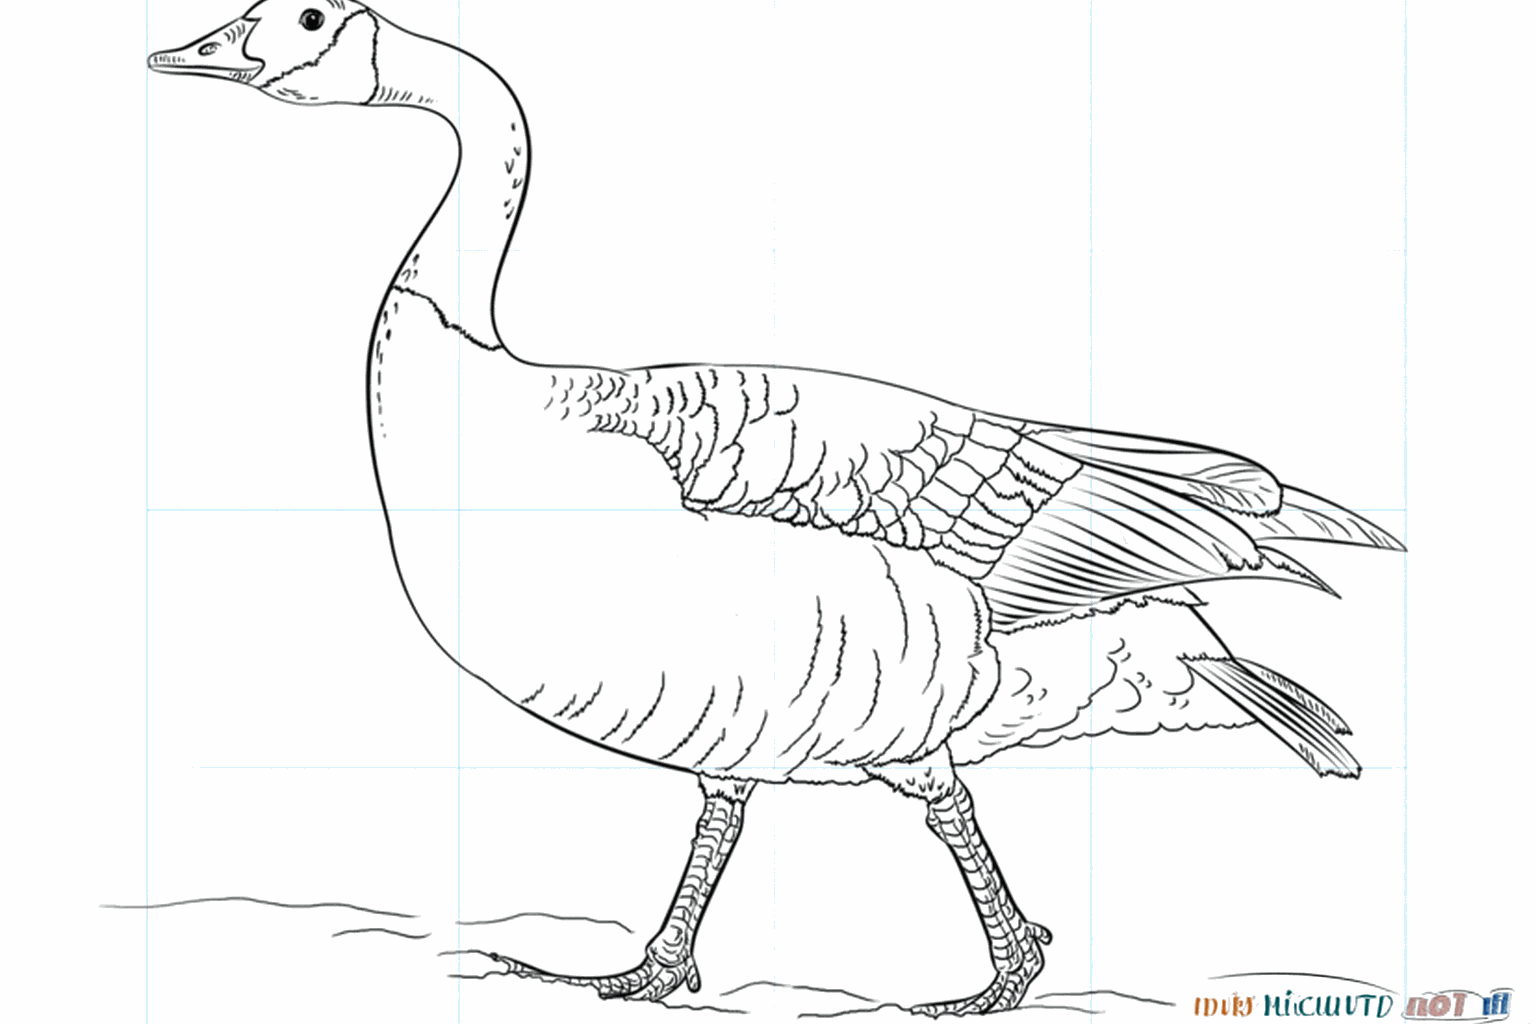
Draw a white patch on the goose's cheek and add small dashes for the feathers.

Erase the guide lines and trace the outer lines of your goose extra dark.
Frequently asked questions
What colors do I need for a Canada goose?
Should I start with a pencil or a marker?
How do I make the feathers look better?
Is this drawing lesson difficult?
Coloring pages of canada goose 2
View all canada goose 2 coloring pagesRelated drawing lessons